
If you currently use classic Outlook on your Windows desktop or laptop, you can enjoy the full Mailock experience with our Outlook add-in. For further information regarding software requirements for Mailock please click here
- To get started, you first need to install the add-in, which can be found here. Simply click on the ‘Download’ button to start.
If you currently have Outlook open, a message will pop up saying that it needs to be closed to complete the install. Make sure to finish up with any open emails before shutting down Outlook and clicking the ‘OK’ button.
- Once downloaded, open the file to start the installer. From there, you just need to read and agree to the licence agreement and click the ‘Install’ button.
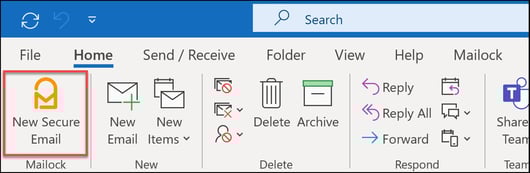
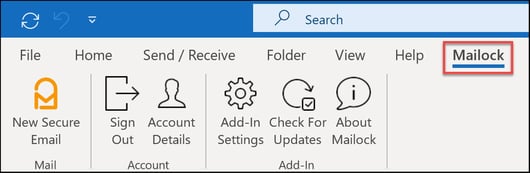
Depending on how your Windows is set up, you may get a ‘User Access Control’ screen displayed, confirming if you want to allow this app to make changes to your device (the message may change slightly depending on your version of Windows). Click on ‘Yes’. - Once the installation is complete, click on the ‘Close’ button and open Outlook. The layout of your Outlook ribbon should now look a little different from normal, as you should have a new ‘New Secure Email’ button in the top left of the ‘Home’ tab, plus an added ‘Mailock’ Tab, as shown in the below images:
You’re now all set up and ready to go! For further information on how to send secure emails using the Outlook add-in please click here
Important Note: If you are having issues, especially with downloads or running the installer, you may not have the right permissions set up on your PC. We recommend getting in touch with your IT department. Or, if you are still having trouble, please get in contact with our support team, we are more than happy to help.
No Mailock button showing? Try this.