.png?)
How to Hide Your Calendar From Everyone in Office 365
 Sabrina McClune
The Office 365 calendar is a useful tool for managing your schedule and coordinating meetings with colleagues.
But there may be occasions when you need to hide your calendar from others, like when you have personal appointments or just want to maintain your privacy.
Controlling who can see your schedule matters for both personal privacy and professional boundaries.
Whether you use Outlook Calendar on the web, on Mac, or on Windows, the steps below show how to hide your calendar in Outlook.
Microsoft explains how calendar sharing works in Outlook; this guide focuses on hiding visibility or removing access.
Contents
- Hiding Your Outlook Calendar on Windows
- Hiding Your Outlook Calendar on Mac
- Hiding Your Outlook Calendar on the Web
- Sharing Your Calendar in Office 365
Hiding Your Calendar in the Windows Desktop Outlook App
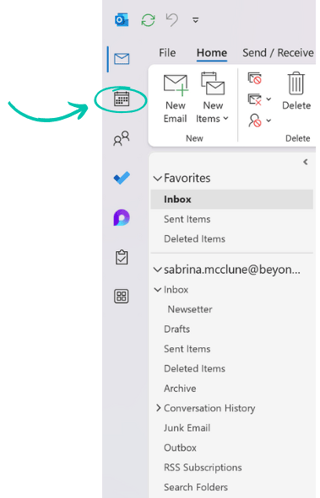
- Open Outlook, then click on the 'Calendar' icon in the left side menu to access your Outlook Calendar.
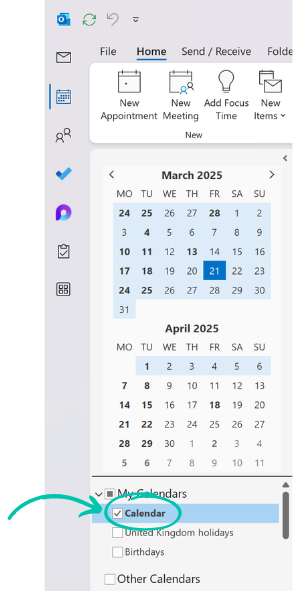
- In the Outlook Calendar, on the left side of the screen, make sure the calendar you want to hide is selected with a check in the box.
- Navigate to the ribbon at the top of the page, making sure you're under the Home tab, before clicking 'Share Calendar'.

- In the drop-down menu, click the name of the calendar you want to edit - a new window will open, displaying the list of people who have access to your calendar.
- Work your way through the list of people, choosing whether to change the calendar permission associated with them or take away their access completely by clicking 'Remove'.
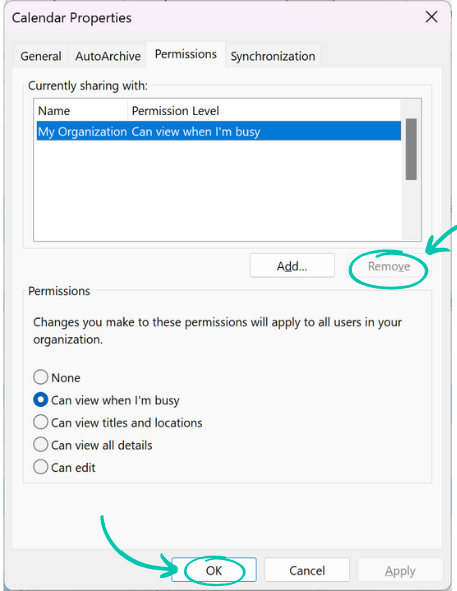
- Confirm the removal and other changes you've made by clicking 'OK'.
- To verify that your calendar is hidden, close and reopen Outlook before navigating back to the calendar permissions window to make sure that the changes applied correctly.
Hiding Your Calendar in the Mac Outlook App
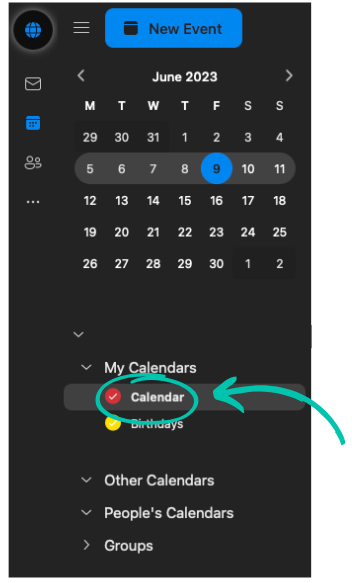
- Open Outlook, then click on the 'Calendar' icon in the left side menu to access your Outlook Calendar.
- Right-click on the calendar you want to edit and click 'Sharing Permissions' from the drop-down menu.
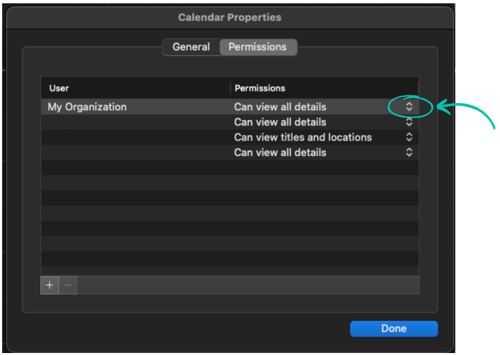
- A Calendar Properties window should appear, showing the list of parties you currently share your calendar with; click the arrow next to the person’s name you need to edit the permissions for.
- In the drop-down menu, choose whether to change the level of access the person has or to remove sharing permissions completely.
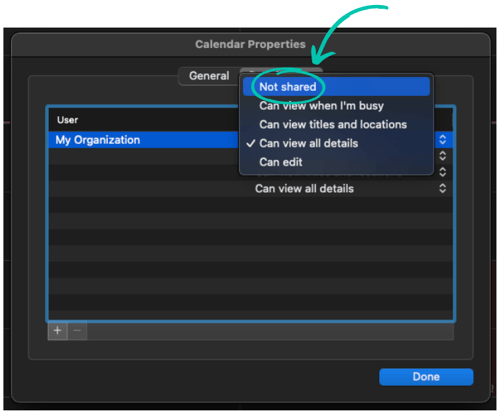
- Click 'Done' to finalise your amendments.
Hiding Your Calendar in the Outlook Web App
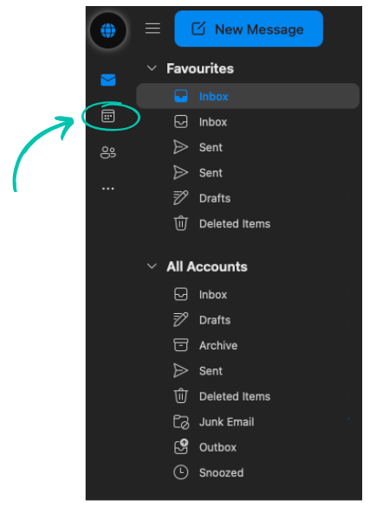
- Navigate to your calendar on the web through whichever Microsoft 365 app you're using, or by heading to the link directly if you have it bookmarked.
- Hover your cursor over the calendar you want to edit, and three dots should appear to the right of the calendar name.
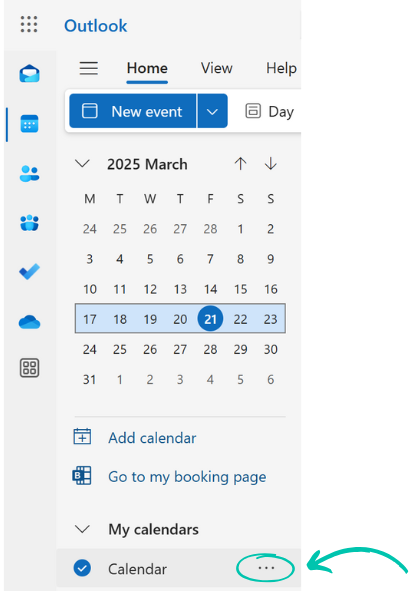
- Click the three dots, then select 'Sharing and Permissions' from the drop-down menu; the Sharing and Permissions window should open, showing a list of people who have permission to view your calendar.

- Press the small arrow next to each person to alter the permissions they have, or click the trash icon to remove them entirely.
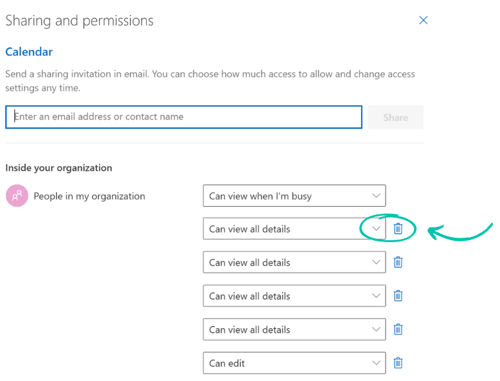
- These changes should save automatically, so click the cross on the window to exit when you're finished.
Sharing Your Calendar in Office 365
Changed your mind and want to add someone back to your shared calendar?
Sharing Your Calendar in Outlook (Desktop)
- Open Outlook, then click on the 'Calendar' icon in the left side menu to access your Outlook Calendar.
- In the Outlook Calendar, on the left side of the screen, make sure the calendar you want to share is selected with a check in the box.
- Navigate to the ribbon at the top of the page, making sure you're under the Home tab, before clicking 'Share Calendar'.
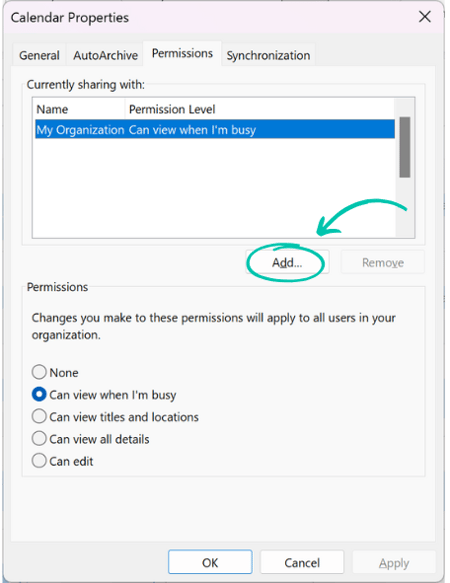
- In the drop-down menu, click the name of the calendar you want to edit - a new window will open, displaying the list of people who have access to your calendar.
- Click 'Add...' to open the Add Users window.
- Find the individual you want to share your calendar with on the list, or search for their name in the search box.
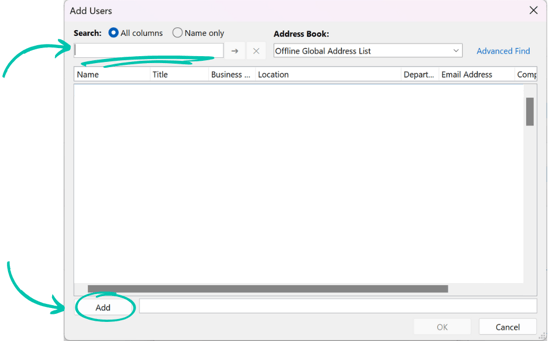
- Click their name and then press 'Add'; their name should appear in the users box at the bottom.
- Press 'OK' to confirm your choice.
Sharing Your Calendar in Outlook (Mac)
- Open Outlook, then click on the 'Calendar' icon in the left side menu to access your Outlook Calendar.
- Right-click on the calendar you want to edit and click 'Sharing Permissions' from the drop-down menu.
- A Calendar Properties window should appear with the list of parties you currently share your calendar with.
- Press the '+' icon at the bottom left of the window, prompting a new window to appear.
- Search for the person you want to share your calendar with in the search bar.
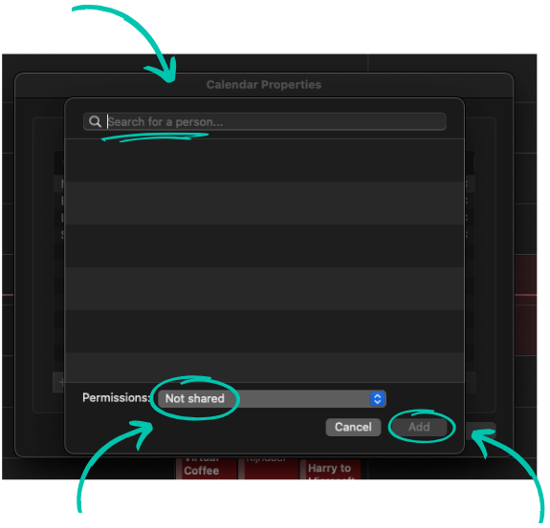
- Choose the level of access you want the individual to have in the drop-down menu.
- Click 'Add' to confirm your changes.
Sharing Your Calendar in Office 365 (Web)
- Navigate to your calendar on the web through whichever Microsoft 365 app you're using, or by heading to the link directly if you have it bookmarked.
- Hover your cursor over the calendar you want to edit, and three dots should appear to the right of the calendar name.
- Click these three dots, and then select 'Sharing and Permissions' from the drop-down menu - the Sharing and Permissions window should open, showing a list of people who can view your calendar.
- In the search box, type the email address or name of the person you want to share your calendar with and select them.
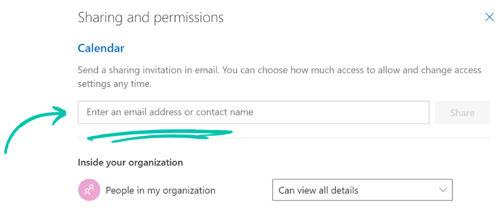
- Choose which level of access they have to your calendar, then click 'Share'.
.png?width=500&height=410&name=Share%20on%20Web%204%20(2).png)
- These changes should save automatically, so click the cross on the window to exit when you're finished.
Follow these steps and you can share or hide your calendar in Outlook, keeping your meetings private from prying eyes.
Remember that these changes only affect who can see your calendar.
They do not affect your ability to view or manage your own appointments.
"Protecting your personal information, including your schedule, is a fundamental aspect of digital security.
Taking control over who can access your calendar helps safeguard your privacy and professional boundaries."
Paul Holland, Founder, Beyond Encryption
FAQs
How Do I Hide My Outlook Calendar from Others?
Edit your calendar's sharing permissions.
On desktop, right-click your calendar, select 'Share Calendar,' and adjust or remove access.
On the web, click the three dots next to your calendar name, then manage visibility under 'Sharing and Permissions.'
How Do I Make My Office 365 Calendar Private?
Set your calendar's sharing permissions to 'View Free/Busy' to limit details.
Remove unnecessary users for complete privacy.
Do People Get Notified When You Stop Sharing Your Calendar?
No, Outlook does not send notifications when you remove someone's access to your calendar.
Can Other People See My Teams Calendar?
Teams calendar visibility depends on your Outlook sharing settings.
Adjust permissions in Outlook to manage access.
How Do I Stop Sharing My Calendar with Someone in Office 365?
In 'Sharing and Permissions,' find the user and either change their access to 'None' or remove them entirely.
How Do I Make Sure My Outlook Calendar Is Private?
Review your sharing permissions regularly.
Limit access to 'Free/Busy' or remove users to control visibility.
|
Legacy article notice: This post is no longer being actively maintained. It reflects information available at the time of writing and may now be out of date (including product features, pricing, screenshots, and guidance). If you spot something that looks incorrect, please treat it as indicative rather than definitive and refer to the latest official documentation or speak to the relevant provider for current details. |
References
Share an Outlook Calendar with Other People, Microsoft, 2024
Reviewed by
Sabrina McClune, 05.12.23
Sam Kendall, 31.05.26
This content is for general information only and is not legal advice.
|
Originally posted on 12 06 23
Sabrina McClune writes about cybersecurity, data protection, digital identity, and digital transformation for Beyond Encryption, helping regulated sectors understand complex technology and compliance topics with greater clarity. |
Email Series
Subscribe to
.svg)
Subscribe to Privacy Decoded, our monthly email briefing about privacy, digital trust, and the forces shaping our online world.